First Datasette App
A step-by-step guide to publishing a simple Datasette application.
This tutorial will walk you through the process of building an interactive Datasette application from a structured dataset. You will get hands-on experience in every stage of the development process while recording it in Git’s version control system. By the end you will have published your work on the World Wide Web.
What you will make
By the end of this lesson, you will publish an interactive database about House of Representatives office expenditures. You will do this by using the data published by ProPublica.

You can see examples of Datasette in action, many of which are journalistic in nature or adjacent.
Prelude: Prerequisites
Before you can begin, your computer needs the following tools installed and working.
An account at GitHub.com
Seriously, that’s it. Well, and a browser.
Git and GitHub
GitHub is a website that hosts git code repositories, both public and private. It comes with many helpful tools for reviewing code and managing projects. It also has some extra tricks that make it easy to publish web pages, which we will use later.
You should create an account at GitHub, if you don’t already have one. The free plan is all that’s required to complete this lesson.
Act 1: Hello Codespaces
Start at the GitHub URL for this repository
Click the green “Use this template” button and choose “Open in a codespace”. You should see something like this:

The browser is divided into three sections: on the left is a file explorer, listing all of the files in this repository. The top right shows whatever file you’re currently viewing or editing, defaulting to README.md. The bottom right shows the terminal, where we’ll run commands.
The codespace will be connected to your repository in the the NewsApps organization on GitHub.
Open up the README by clicking on README.md on the left side and type something in it. Maybe change the heading like:
# My First Datasette App
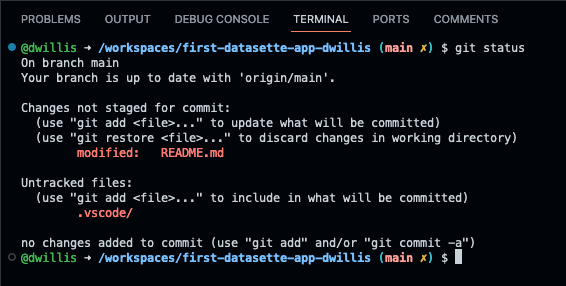
Make sure to save it. You’ll see on the left that there’s a yellow “M” next to README.md, meaning you’ve made some edits. Let’s double-check that in the terminal:
$ git status
You should see something like this:

If so, we can add and commit it:
$ git add README.md
Log its creation with Git’s commit command. You can include a personalized message after the -m flag.
$ git commit -m "First commit"
Now, finally, push your commit up to GitHub.
$ git push origin main
Reload your repository on GitHub and see your handiwork.
Act 2: Hello sqlite-utils
Use pip on the command line to install sqlite-utils, the Python library we’ll use to load our data.
$ pip install sqlite-utils
You can check to see if the library installed using the command-line:
$ sqlite-utils
Let’s grab two CSV files and load them into a SQLite database we’ll create using the sqlite-utils library.
Create a directory for your data files and change into it.
$ mkdir data
$ cd data
Use wget on the command line to download the CSV files, renaming them using the -O switch:
$ wget https://projects.propublica.org/congress/assets/staffers/2022Q3-house-disburse-summary.csv -O summary.csv
$ wget https://projects.propublica.org/congress/assets/staffers/2022Q3-house-disburse-detail.csv -O detail.csv
Use sqlite-utils on the command line to load the files into a SQLite database that we’ll call house_expenses.db:
$ cd .. # move up to the main directory
$ sqlite-utils insert house_expenses.db summary data/summary.csv --csv
$ sqlite-utils insert house_expenses.db detail data/detail.csv --csv
Act 3: Hello Datasette
Use pip on the command line to install Datasette, the Python library we’ll use to publish our data.
$ pip install datasette
You can check to see if the library installed using the command-line:
$ datasette
Now let’s fire up Datasette’s built-in server to run the app locally:
$ datasette serve house_expenses.db
On the lower right, you should see a small window pop up with the message that you can “Open in Browser”.

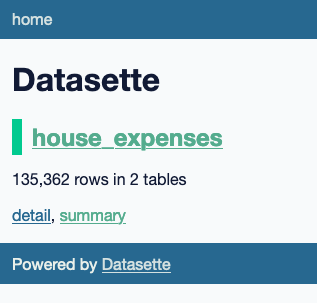
Click on that button to see your running app.
Act 4: Customizing Datasette
Let’s look at the summary table - and click on the AMOUNT header, which should sort the amounts. You can see that SQLite doesn’t seem to think the values in this columm are numbers; instead it is sorting them as text. Let’s fix that.
Back in the terminal, hit Ctrl-C to stop the local server and change some of the columns in our house_expenses.db file to the correct datatypes:
$ sqlite-utils transform house_expenses.db summary --type AMOUNT float --type YTD float --type YEAR integer --type QUARTER integer
$ sqlite-utils transform house_expenses.db detail --type AMOUNT float --type YEAR integer --type QUARTER integer
Now let’s try that server again:
$ datasette serve house_expenses.db
Now you can see that if you sort AMOUNT in descending order the results are arranged correctly.
Act 5: Hello Internet
In this final act, we will publish your application to the Internet on Fly.io. To do this you will need to have a free “trial” Fly.io account and install the Flyctl command-line tool. Once you sign up for an account, you can run this in the terminal to install the tool:
$ curl -L https://fly.io/install.sh | sh
$ export FLYCTL_INSTALL="/home/codespace/.fly"
$ export PATH="$FLYCTL_INSTALL/bin:$PATH"
Then you’ll need to authenticate your account:
$ flyctl auth login
This will generate a URL that you will copy into a browser tab and proceed to follow its prompts. Remember: you want the free account.
After that, you’ll need to create a special file called fly.toml that will help deploy the app. Follow the instructions here, giving your app a name and choosing the defaults otherwise. When you’re done, you can deploy the app:
$ flyctl deploy
Now wait a minute or two, then visit https://fly.io/dashboard/personal to see your application’s status and to find the link to it on the Web.
Finally, you can add your changes to your GitHub repository and push them:
$ git add .
$ git commit -m "finished tutorial!"
$ git push origin main